
Before you start
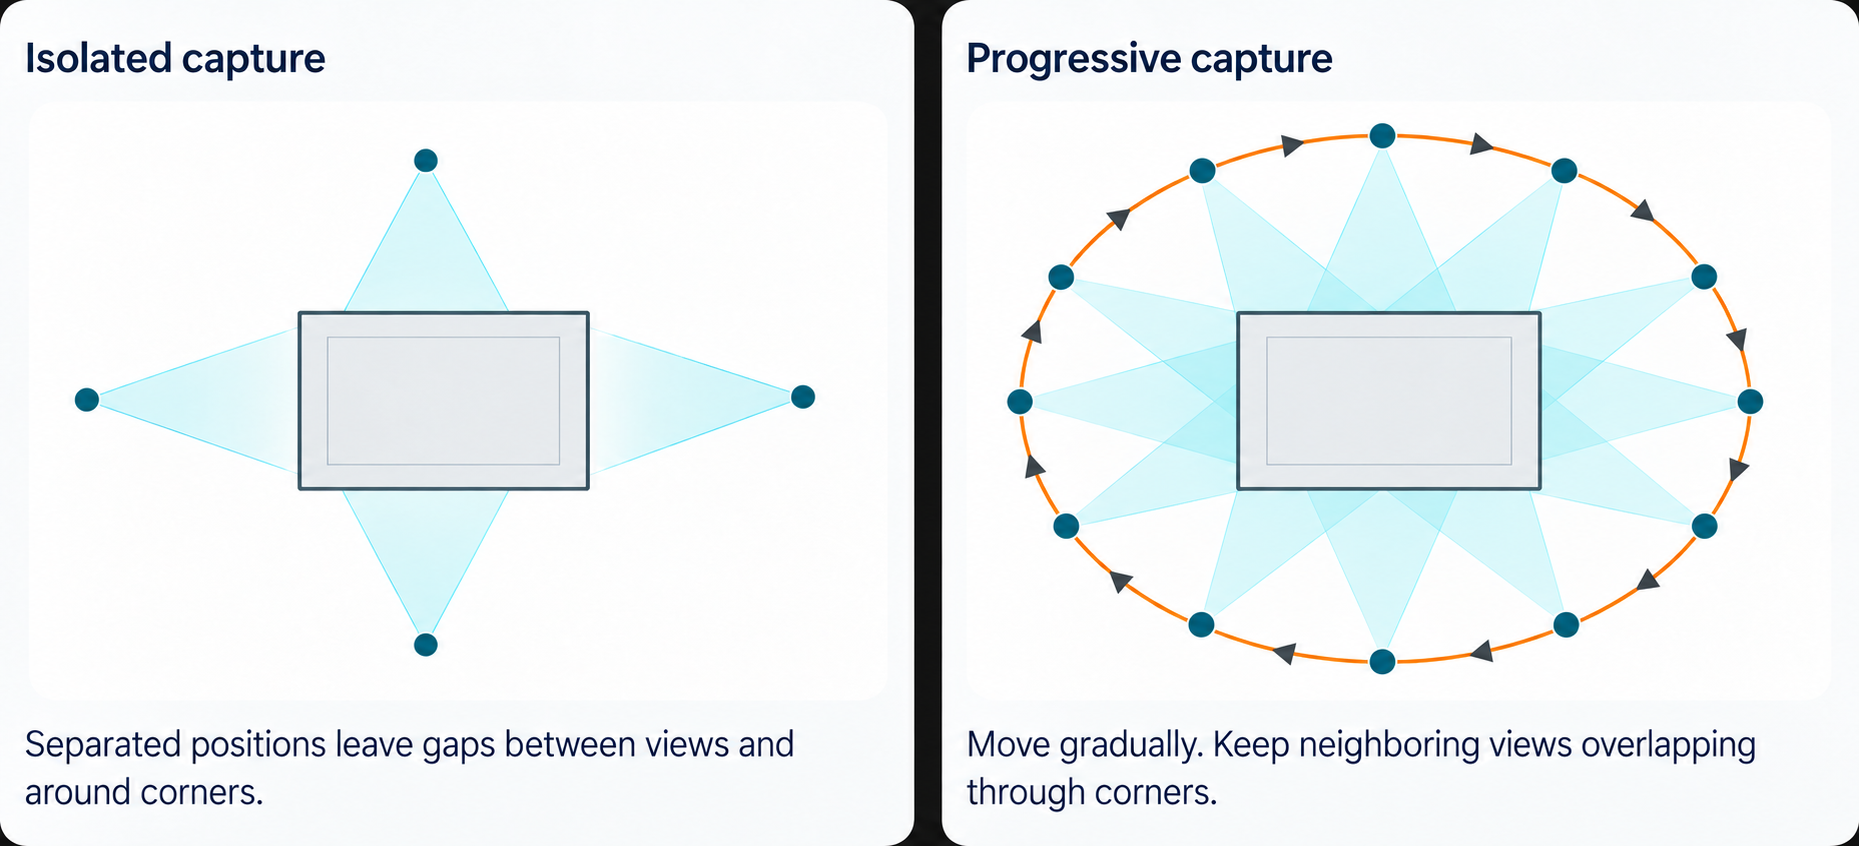
Photogrammetry works best when neighboring images share visible coverage. Seeing every side is not the same as capturing a connected sequence.
Step-by-Step Guide
1. Open 3D Models
Select your project and choose 3D Models in the sidebar.
2. Choose Create 3D Model
Choose Create 3D Model, then open Add media. For this guide, choose Project media.
Project media lets you choose photos already in the project. Select a folder and Select files let you choose a folder or individual files from your computer.


Coverage matters more than photo count
Seeing every side is not the same as connected coverage. Keep shared visual details between neighboring captures so the scene can connect.
Capture 3D models with your phone
Move progressively around the site or structure. Keep neighboring views overlapping and add coverage through corners and transitions.
Using a drone? See the drone capture notes below.
3. Select and review project media
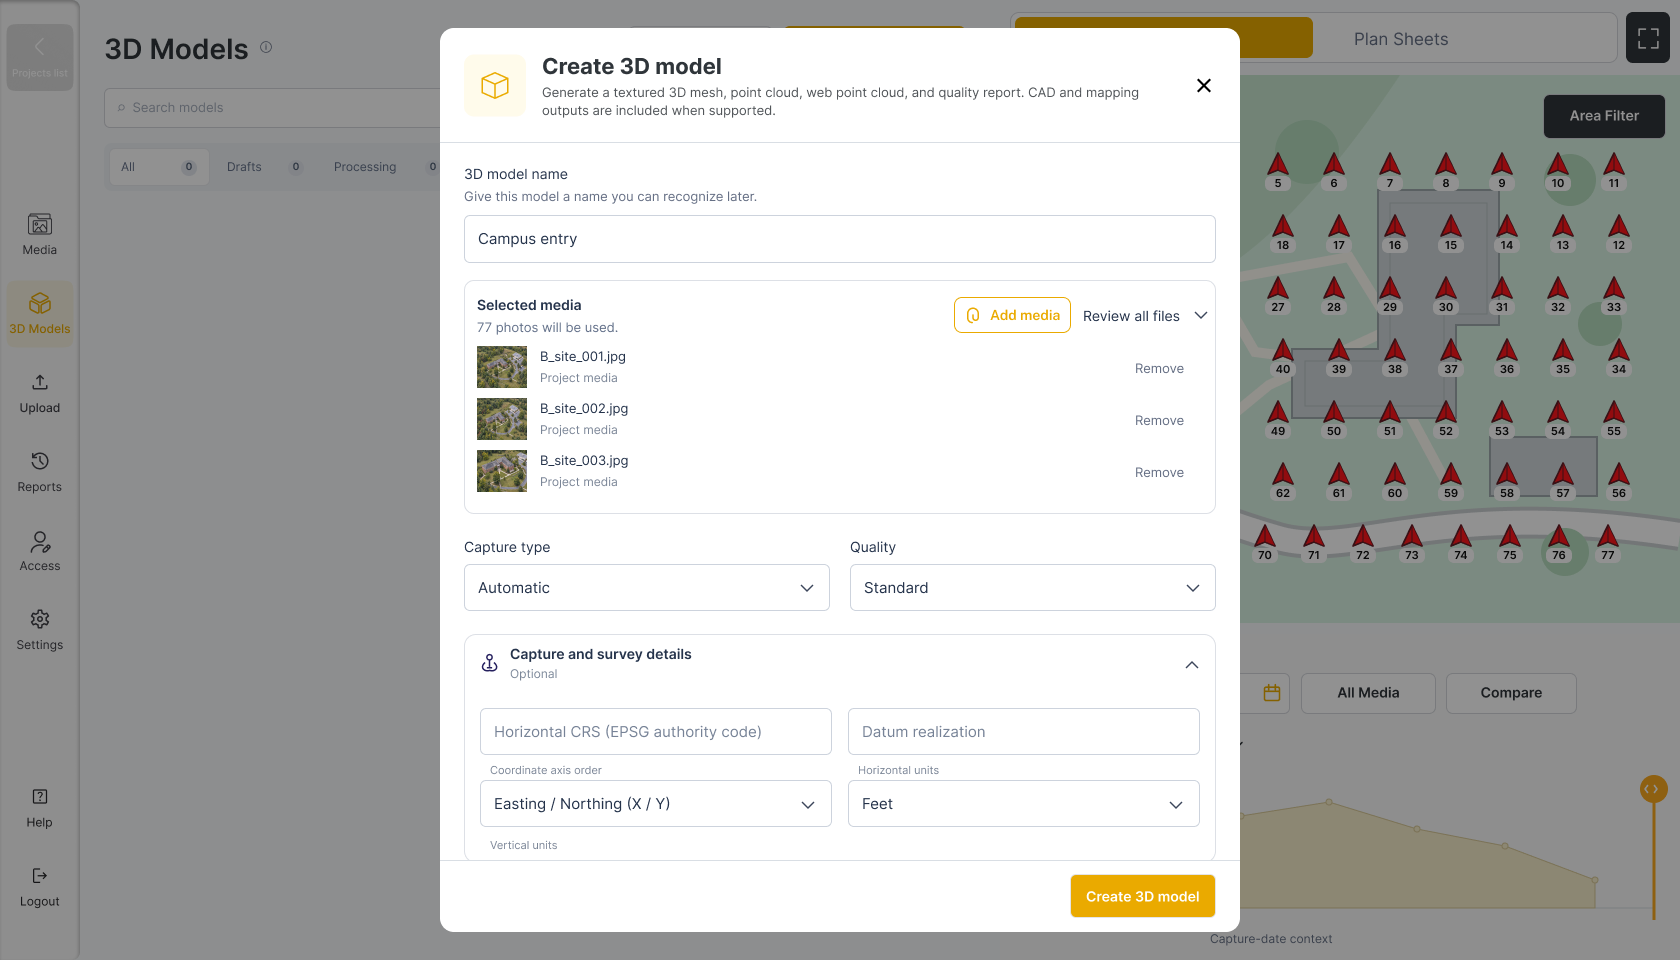
Choose the related project media for the model. Review the selected set in the available list and map context, then continue with the model setup.
Choose Select All for this example set. The selected count and map markers change together. Choose Use Selected Media to return to setup.
Need help finding the right photos? See the media-selection guides below for finding media by date or area and sorting the results.
4. Review model setup
Give the model a recognizable name, then review the Capture type and Quality controls. Review Selected media and use Review all files for a closer look at the set.
5. Create the model and follow processing
After reviewing the selected media and setup, choose Create 3D model. Follow the model’s status in 3D Models until a result is available.
6. Open and inspect the available result
Choose Open Model on the available result to inspect it in the viewer.
Notes
If you capture with a drone
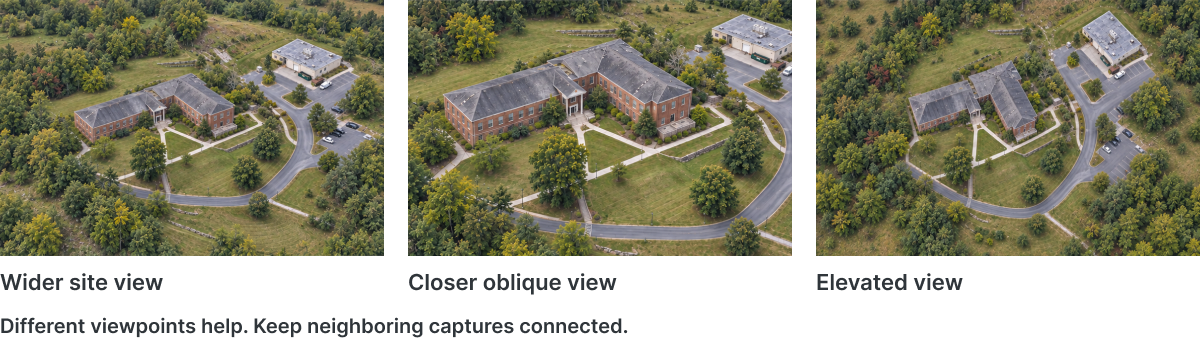
Use a consistent route or orbit. Overlapping oblique and upper views can help connect a wider site.
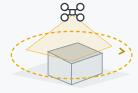
Keep shared detail between consecutive photos and neighboring flight lines. Where the subject needs it, add oblique views to cover walls and corners. Use sharp, consistent images; choose route, height, speed, and camera settings for your drone, site, and required detail. See image-acquisition guidance for planning principles.